Latest News
How to Create Online Courses with Wondershare DemoCreator: The Best Screen Recorder and Video Editor

Wondershare DemoCreator
In today’s world, the way we consume information has been drastically changed. Gone are the days when students had to physically attend classrooms. The present century belongs to online learning and it is time you step-up your game as well. The first and the most important thing you need is a professional screen recording tool to create online lectures. In this post, I’m going to provide a stepwise guide to make all kinds of online courses with one of the best screen recorders.
Why you Should Create Online Learning Material?
Before we start exploring how to use a screen recording tool, let’s quickly have a look at what makes e-learning so important.
- As of now, it is estimated that over 80% of the total information consumed on the internet belongs to video content.
- The ongoing pandemic has changed the landscape of education with almost everyone offering online courses.
- It is just easier to work on asynchronous teaching. You can create a flawless lecture at your pace after making the needed edits.
- Not just for creators, even your students can watch (and re-watch) your videos online whenever they want.
- By uploading your lectures online, you can just reach out to a wide audience (even millions) easily.
How to use Wondershare DemoCreator to Make Online Courses?
Online content creators can simply take the assistance of Wondershare DemoCreator to record their videos or edit them in the same place. The tool is extremely easy to use and comes with tons of screen recording features for educators.
- Using Wondershare DemoCreator, you can record the entire screen or even crop any area in the screen for recording.
- Apart from their screen, educators can include audio via microphone or integrate their webcam as well.
- DemoCreator is a sophisticated tool that can utilize multi-core processors to improve the recording performance (even at 120 frames per second).
- While recording the screen, you can use various features like a drawing tool, spotlight, annotations, and more.
- The best part about DemoCreator is that there are no limitations on the length or the number of recordings. It even supports recording in high definition.
To get things started with DemoCreator for recording your screen, you can follow this basic drill:
Step 1: Open the Screen Recorder
At first, you can just install and launch Wondershare DemoCreator on your computer. From the available options on its home, click on the “New Recording” feature.

Step 2: Set up the recording area
As the interface would be launched, you can go to the “Screen” feature and set up an area for recording. You can choose to record the entire screen or a part of it via the DemoCreator option. There are options to select a frame rate for the recorded video.

Step 3: Set up the audio and camera input
Besides that, you can also go to the “Audio” tab to set up the audio input from your computer and your microphone.

In the same way, you can go to the “Camera” section and choose if you wish to capture the webcam’s input. You can even select a preferred resolution and frame rate for the camera.

Step 4: Start recording your screen
After setting up everything, you can click on the “Capture” button or press the F10 key to start recording the screen. DemoCreator would display a widget that you can use to stop/pause the recording.
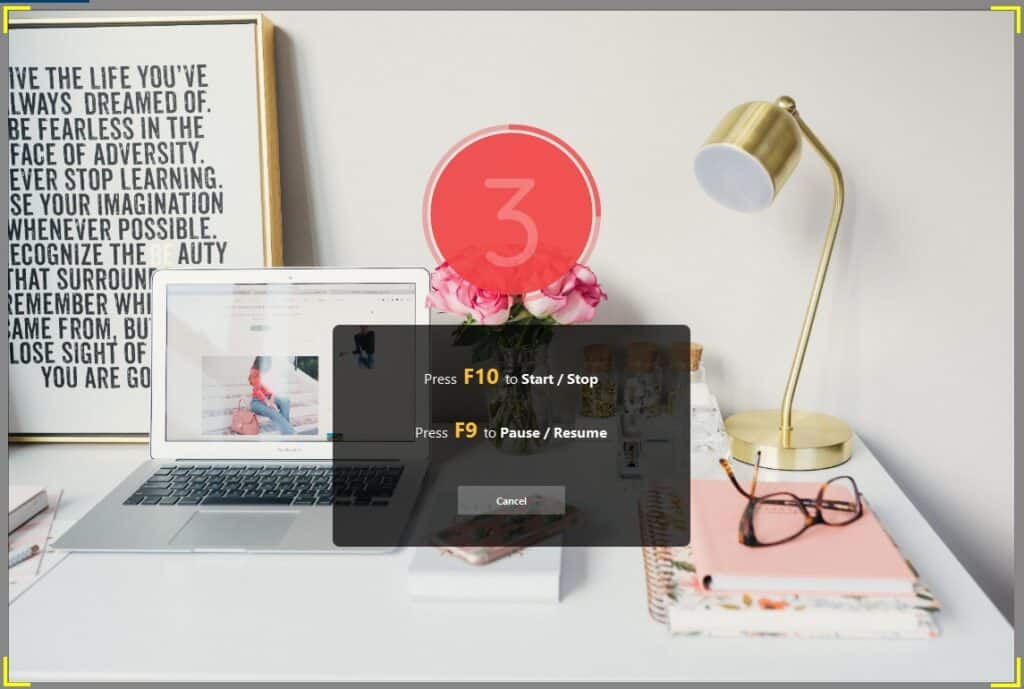
If you want, you can even turn on the “Screen Drawing Tool” feature from the interface of DemoCreator. This will display a dedicated drawing toolbar at the top that you can use to mark anything on the screen while recording. You can also use it to focus on anything (via spotlight), apply annotations, and change the recording area.

How to Make More Interactive Educational Videos?
A simple recording of your screen might not be enough as you would need to edit the video to make it more appealing. Thankfully, Wondershare DemoCreator also has a dedicated editor to make your informative videos interesting. To access it, just launch DemoCreator, and go to the “Video Editor” feature instead.
Tip 1: Trim your videos to highlight the best clips
While recording your screen, your videos might have come unwanted segments. To fix this, just load the video on the timeline of DemoCreator. Now, you can use the inbuilt trimming tool to clip out any unnecessary parts.

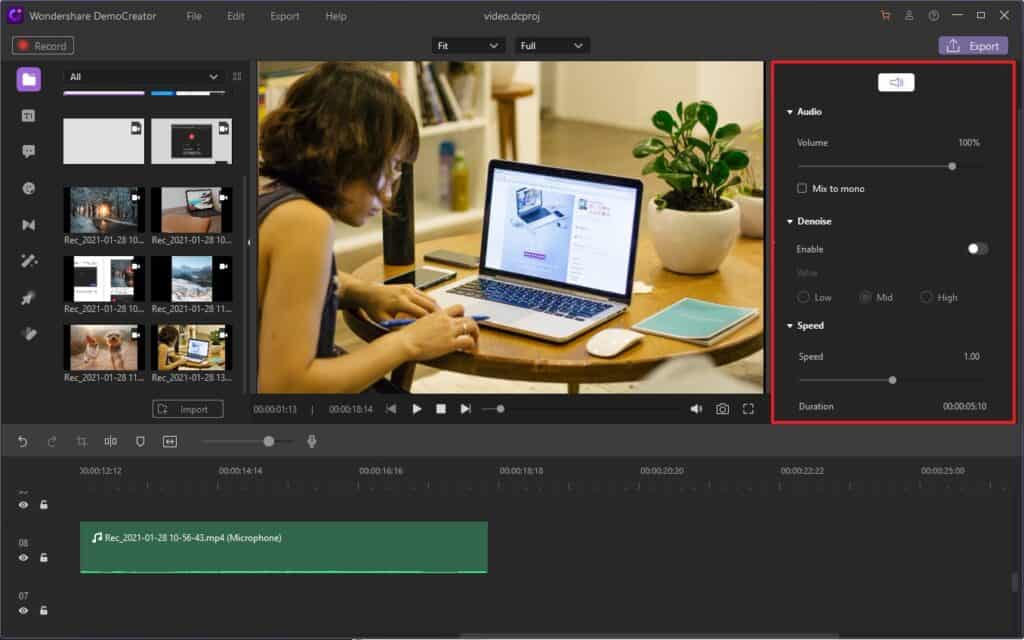
Tip 2: Edit or Denoise the audio
Not only the screen recording, but you need to make sure that the audio is crisp and clear in your videos too. For this, you can use the inbuilt audio editing features of DemoCreator that can mute, denoise, and adjust the audio quality.
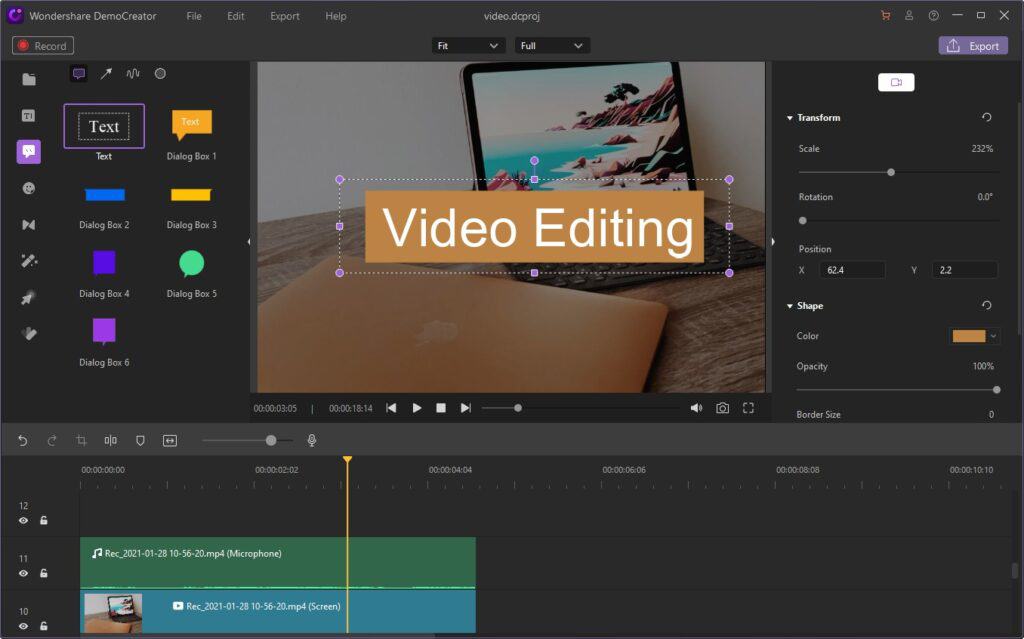
Tip 3: Add annotations and comments to explain something
In the video editor of DemoCreator, you can even go to the Annotations feature. This will let you add stickers, comments, shapes, and other annotations to explain anything to your students easily.
Tip 4: Work on Different Transition Effects
If you are merging different scenes or moving from one clip to another, then you can also apply a suitable transition. There are different styles of transition effects on DemoCreator that you can instantly apply to your videos.
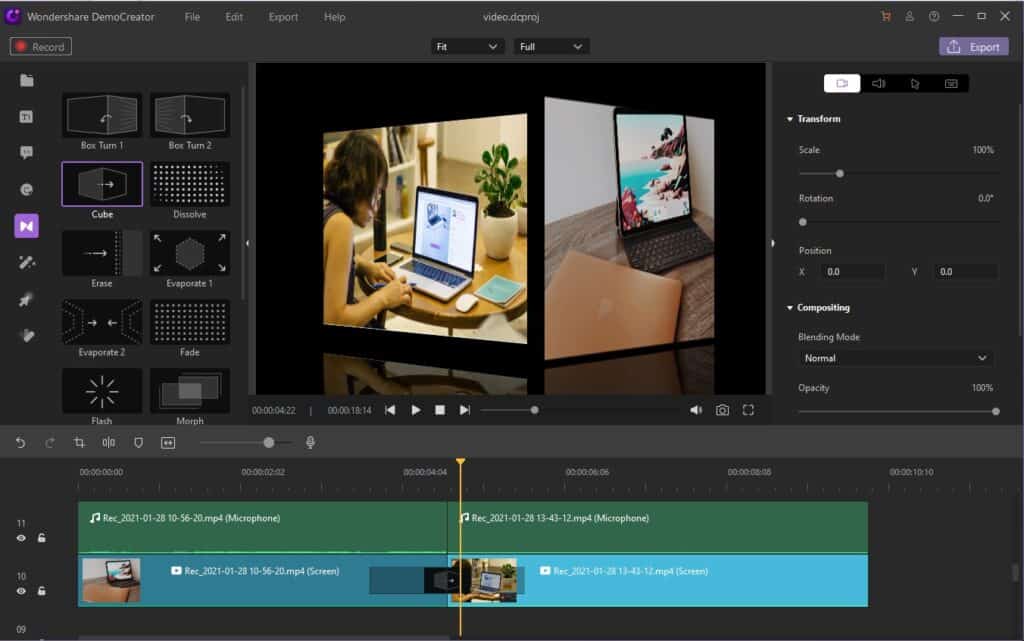
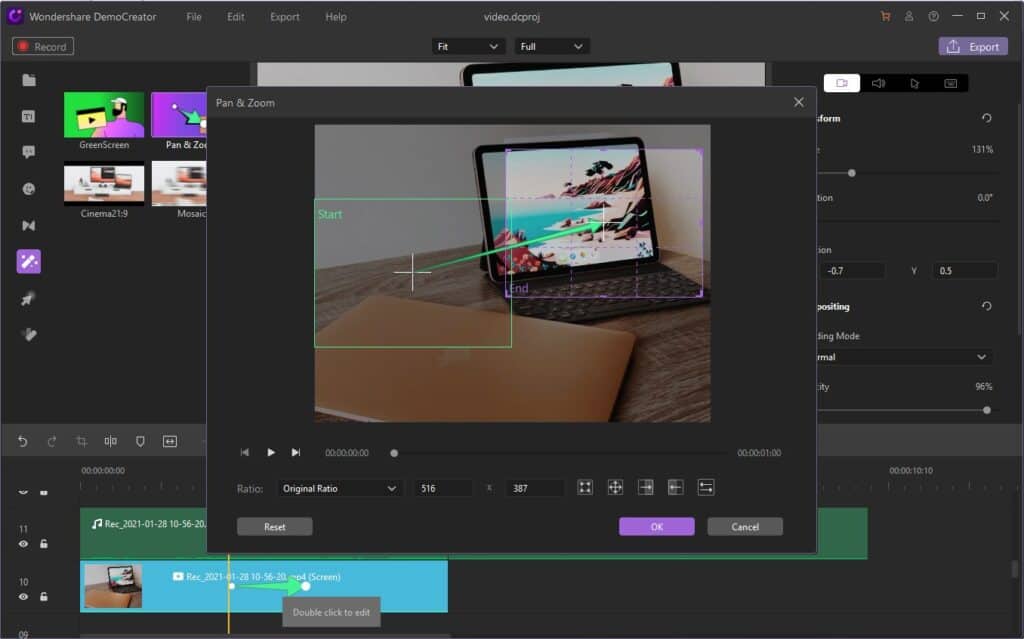
Tip 5: Work on other Advanced Transition Effects
While exploring the DemoCreator interface, you can explore several other advanced editing features. For instance, you can add captions at the starting/ending of the video, apply the pan and zoom effects, or even use its inbuilt green screen features.
Export your Recorded Videos the way you like
After recording and editing your videos, you are all set to save them. For this, just go to the Export section of DemoCreator and select a preferred format to save your videos. You can also select a preferred resolution or bit-rate to save your videos and can further directly broadcast them to your YouTube channel.

As you can see, with the help of a professional tool like Wondershare DemoCreator, working on educational videos is easier than ever. I would recommend exploring the tool on your own as it offers a free trial and comes with tons of screen recording and video editing features that would be extremely helpful to you.
Sebastian was born and raised in the busy city of Abbottabad. As a journalist, Saad Mushtaq has contributed to many online publications including the PAK Today and the Huffing Post. In regards to academics, Saad Mushtaq earned a degree in business from the Abbottabad UST, Havelian. Saad Mushtaq follows the money and covers all aspects of emerging tech here at The Hear Up.Thanks


