
NEWS
How To Plan A Backyard Spa Retreat For Comfort, Privacy, Safety, And Year-Round Use

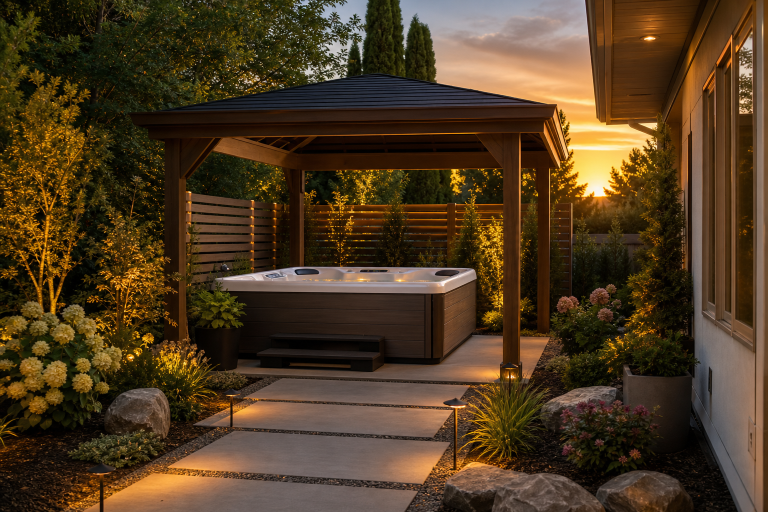
Key Takeaways
- Start with the yard’s layout, drainage, access, and structural needs before choosing a spa.
- Plan separate areas for soaking, walking, changing, relaxing, and storing supplies.
- Use layered privacy, low-glare lighting, and non-slip surfaces to improve comfort and safety.
- Consider energy use, water care, permits, and seasonal conditions before installation begins.
- Choose features based on real household habits rather than appearance alone.
A backyard spa should feel like a natural extension of the home, not an oversized appliance placed in the first open corner of the yard. For homeowners comparing layouts, sizes, and installation needs, Bullfrog Spa dealers Salt Lake City can be a helpful starting point for understanding what may fit the space and the household’s routine.
The best results come from planning the full experience before equipment arrives. A convenient path, a stable base, privacy from nearby windows, safe lighting, and an easy maintenance routine all matter as much as jets or seating styles.
Why Planning Matters Before Installation
A spa can become a favorite place to unwind, but rushed placement can create lasting frustrations. A location beside the back door may be ideal for winter use, for example, yet it could also sit directly in view of a kitchen window, a neighbor’s patio, or a busy street. Planning first helps prevent drainage problems, awkward traffic patterns, difficult repairs, excessive noise, and privacy gaps.
Think of the spa as one part of an outdoor living area. It needs room for people to enter safely, remove the cover, clean the filters, set down towels, and relax after soaking. When every element has a purpose, even a modest yard can feel calm and complete.
Step 1: Study the Yard and Choose the Right Location
Walk the yard at different times of day before settling on a location. Notice where water collects after rain, where the afternoon sun feels intense, and which sightlines feel exposed. The ideal site is usually close enough to the house for convenience but far enough away to preserve privacy and avoid crowding doors, windows, and walkways.
- Choose level ground that can support the filled spa and its occupants.
- Make sure rainwater drains away from the home and does not pool around the base.
- Map a delivery route wide enough for the equipment and installers.
- Leave service clearance for panels, pumps, filters, and cover removal.
- Keep the route from the house short, dry, and safe in rain, snow, or freezing weather.
- Avoid locations directly beneath trees that drop heavy leaves, needles, sap, or branches.
Step 2: Build a Safe and Stable Base
A filled spa can weigh several thousand pounds once water and users are included, so the base cannot be an afterthought. Reinforced concrete is a common choice, while properly prepared pavers may work for some installations. Raised decks and platforms require special attention because the structure must safely carry the full load over time.
The finished surface should be level, durable, and designed to manage water. Do not set a large spa on loose soil, an uneven lawn, or a deck that has not been evaluated for the load. When a deck or elevated platform is involved, consult a qualified builder or structural professional before installation.
Step 3: Create Privacy Without Closing In the Space
Privacy does not have to mean building one tall wall around the spa. Layering materials often creates a more welcoming result while keeping air and light moving through the space.
Options for a More Private Retreat
- Plantings: Hedges, ornamental grasses, shrubs, and small trees soften views and add natural texture.
- Privacy panels: Slatted wood, metal, composite, or weather-resistant fabric screens work well in narrow side yards.
- Pergolas: Overhead structures can add shade and partial screening, especially with curtains or climbing plants.
- Fencing: Fences offer stronger visual separation, although height, setback, and property-line rules may apply.
A practical approach may combine a low screen near seating, taller plants along a boundary, and soft lighting that draws attention inward rather than toward surrounding homes.
Step 4: Divide the Area Into Useful Zones
Instead of arranging furniture randomly around the water, establish a few clear zones. This makes the space easier to use, cleaner to maintain, and safer for guests.
- Water zone: Include the spa, steps, handrails, towel hooks, and a clear entry area.
- Transition zone: Add a non-slip path, outdoor mat, or compact changing spot between the house and spa.
- Lounge zone: Reserve space for chairs, a bench, or a covered cooling-off area.
- Storage zone: Use a weather-resistant cabinet for towels, cleaning tools, and securely stored chemicals.
Keep walkways open. No one should have to step over cords, hoses, planters, or furniture while carrying towels or moving around wet surfaces.
Step 5: Use Lighting That Supports Comfort and Safety
Low, warm lighting makes the retreat usable after sunset without creating harsh glare on the water. Install path lights near the route from the house, illuminate stairs and changes in elevation, and use gentle accent lighting on plants or walls. Avoid fixtures that shine directly into bathers’ eyes.
All fixtures should be rated for outdoor use, and a qualified electrician should handle spa-related wiring. Timers or smart controls can also reduce wasted electricity when lights are used at the same time each evening.
Step 6: Choose Features That Match Real Use
Choose seating and accessories based on who will use the spa most often. Deep lounge seats may appeal to one person but feel awkward for another, while open seating can make conversation easier for families and guests. Entry steps and handrails are especially valuable for older adults or anyone with limited mobility.
Practical details often matter most over time. Consider a cover lifter, towel storage, drink ledges, wind protection, and sound levels if bedrooms or neighboring homes are nearby. A beautiful layout should still be easy to enter, clean, cover, and enjoy on an ordinary weeknight.
Step 7: Review Energy Use and Water Care
Energy costs depend on insulation, the cover, heater settings, pump operation, weather, wind exposure, and how often the spa is opened.
Water care is equally important for comfort and equipment life. A consistent routine should include testing, recording readings, cleaning filters, removing debris, and draining or refilling according to use and manufacturer directions. For home hot tubs, keeping pH between 7.0 and 7.8 and maintaining proper sanitizer levels helps support cleaner water.
Step 8: Plan for Safety, Permits, and Every Season
Use a locking cover when the spa is unattended, store chemicals in a cool and secure location, and choose non-slip surfaces around the water. Keep extension cords and electrical devices away from wet areas, establish clear rules for children and guests, and keep water temperature at safe settings. Children younger than 5 should not use hot tubs.
Before construction, check local requirements for electrical circuits, decks, fixed installations, barriers, fences, and inspections. Keep permit records and equipment details for future service or resale. Seasonal planning also helps protect the investment: inspect drainage and filters in spring, manage heat and shade in summer, remove leaves in fall, and clear snow while maintaining a well-lit winter path.
Common Planning Mistakes to Avoid
- Forgetting delivery access and service clearance.
- Skipping drainage or base preparation.
- Installing under messy trees or near excessive wind exposure.
- Using bright lights that create glare rather than guidance.
- Underestimating electrical, foundation, and permit costs.
- Choosing features that do not fit the household’s routines.
- Waiting until after installation to create a water-care plan.
Final Planning Checklist
- Measure the yard, access route, and available service space.
- Choose a level site with dependable drainage.
- Confirm that the base or deck can support the finished weight.
- Plan privacy, lighting, storage, seating, and non-slip paths.
- Compare operating costs, cover quality, and energy information.
- Check permits, safety requirements, and seasonal maintenance needs.
A successful backyard spa retreat is built on thoughtful planning, not unnecessary extras. With the right location, stable base, private layout, safe access, efficient equipment, and regular maintenance, the space can remain comfortable and inviting throughout the year.