
NEWS
How to Create a Beautiful Hallway Gallery Wall: 7 Simple Steps
Creating a hallway gallery wall, especially with photographs and art, is easy to do. And it can be done in just a few easy steps.
The hallway is a room that brings many rooms together. It acts as a transition between rooms, so without one, your home may feel disjointed and clunky.
Creating a gallery wall will not only make your hallway a more welcoming place and your photos a delightful decoration. But one can also act as a pathway to the rest of your home.
So, why not turn that transition into an art gallery? Here are seven simple steps to build the perfect wall in your hallway. Trust us, it’s easier than you think.
1. Clean and Tidy Up
When creating a beautiful hallway gallery wall, the first step is to clean and tidy up the hallway where the gallery wall will be placed. This should include vacuuming, dusting, and mopping any floors, washing any walls or doors, and dusting and/or polishing any furniture in the hallway. All unnecessary clutter should be removed from the area.
If the gallery wall is placed over a piece of furniture, then that piece should be moved away to make installation of the wall easier. Once the hallway is free from any obstruction and dust and dirt are cleaned up, the gallery wall will be able to be put together. Clean and tidy up is the first and most important step in assembling a gallery wall.
2. Start Collecting
Begin assembling the pieces that you will use to create your hallway gallery wall. Start by deciding if you want to have a theme or look and use that to guide your choices. Consider pieces you already own, artwork, family photos, or vintage and antique items.
Research online for inspiration and ideas and continue gathering pieces until you have enough for the wall. Visit flea markets, antique stores, consignment shops, yard sales, and online retailers for unique finds. Shopping second-hand or upcycling items is an eco-friendly and cost-effective way to save money.
3. Create a theme
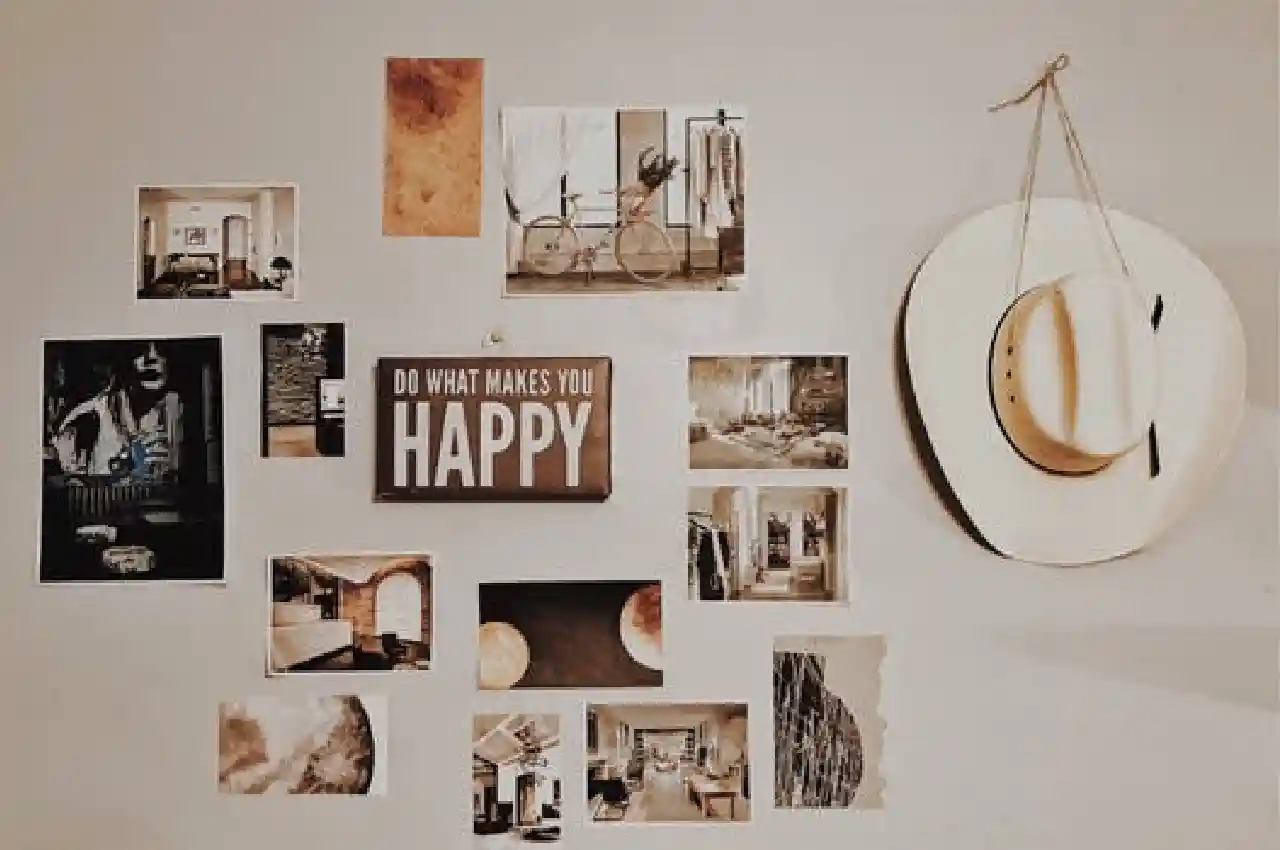
Creating a beautiful hallway gallery wall can be easy to achieve with the right theme. The first step in creating a stunning display is to decide on the style, theme, colors, and objects you want to have included. Think about the colors used in your home and pick one that will create a cohesive aesthetic.
Next, choose art that fits your theme, like travel-inspired prints or landscapes. Framing the pieces will give them a neat, polished appearance.
Finally, hang the pieces of art strategically on the walls so that the display is balanced and inviting. You should also want to think about a gallery wall template. If desired, add stands or shelves displaying small objects.
4. Make Sure to Measure Up
Measure the wall’s width and height carefully to know what furniture and artwork you can put on the wall. Hang a measuring guide on the wall. Mark the starting and end points of the border with the painter’s tape.
Once you have the measurements, create a hanging board of the wall. Measure how far apart the pieces should be, and then use a level to make sure each piece is at the same level. This will ensure the art pieces are placed on the wall, and it’s always wise to take time when measuring to create a beautiful hallway gallery wall.
5. Pick Your Frames
Creating your hallway gallery wall is easy as long as you start with the right materials. When it comes to picking your picture frames, it’s important to consider size, style, and color. Consider the size of your wall and the overall style of your hallway when selecting your frames.
If your hallway has a modern, minimalist look, choose simpler frames in a variety of sizes. For a more vintage look, go for ornate frames in various shapes and sizes.
As for color, it’s best to stick to one color palette, such as black and white, or shades of grey and gold. Make sure to research online for more picture frame wall ideas to help you choose.
6. Begin Hanging
Begin by measuring your wall. Take note of any windows, radiators, pipes, and light switches. This will ensure that you can properly plan where to position your artwork. Place the items on the floor and experiment with their arrangement before attaching them to the wall.
Use paper templates as a guide and make markings on the wall that indicate where each item will go. This will make it easier when it comes to hanging.
Once you have marked out the locations, use a suitable type of hardware and nails to attach all the items. Finally, stand back and enjoy your beautiful hallway gallery wall.
7. Add Other Decor
Incorporate meaningful items such as favorite vases, pottery, or trinket boxes into the mix. These can be showcased either on shelves or on a mini console table. Once the entire wall looks complete, try adding lighting such as a sconce or string lights.
Consider putting in a small stool or two and a round soft area rug to define the space further. If necessary, add storage solutions such as a basket to hold items like keys and umbrellas.
Finally, add a few indoor plants or a tall tree to soften the look of the wall and add some life to the overall area. You might also want to match your gallery inspiration with your decor.
Start Creating Your Hallway Gallery Wall Today
Creating a beautiful hallway gallery wall doesn’t have to be difficult. With the simple steps outlined, you can easily create a gallery wall that is sure to impress. Have fun shopping for artwork, design your layout, and then follow the simple steps recommended to hang your pieces safely and beautifully.
You can also consult an interior designer for more hallway gallery wall ideas. Go ahead, and create your gorgeous gallery wall to show off!
If you want to read more interesting articles, go to our daily blog post for the newest topics.
Having completed my education in English, I’ve cultivated a successful career as a content writer. My tenure includes valued collaborations with distinguished professional organizations, reflecting my commitment to producing high-quality content.
Contact me on this mail: [email protected]