
NEWS
Showcasing Your Products: CapCut’s Guide to Creating High-Quality Product Videos

In today’s digital age, visual content plays a vital role in marketing and advertising. When it comes to promoting your products, an effective way to capture your audience’s attention is through high-quality product videos. These videos not only showcase your products in action but also highlight their unique features and benefits.
With the rise of smartphone videography, creating professional-looking product videos has become more accessible than ever before. In this article, we will explore a step-by-step guide on how to create stunning product videos using CapCut, a free web video editor. So, let’s dive in and discover how you can make your products shine on screen!
CapCut’s Attributes for Creating High-Quality Product Videos

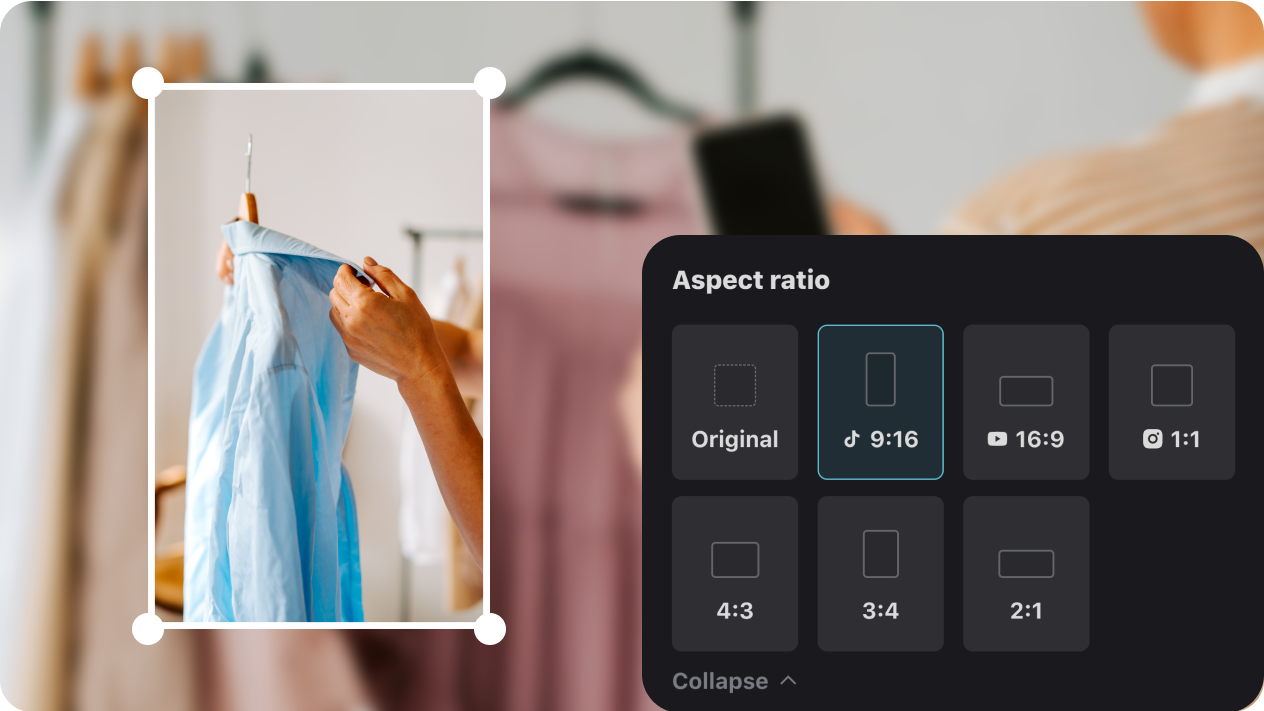
Source: CapCut
- Intuitive Interface: CapCut provides an intuitive and user-friendly interface, allowing users to navigate effortlessly through its features and create professional-looking product videos with ease.
- Effects and Filters: With a vast collection of effects and filters, CapCut lets users enhance their product videos and add creative elements. From cinematic filters to stylish transitions, these features help elevate the overall quality and visual appeal of the video.
- Text and Titles: CapCut enables users to add text overlays and titles to their product videos. This attribute is particularly useful for highlighting key features, showcasing product names, or including engaging captions. Users can customize the font, size, color, and animation of the text to align with their branding and video style.
- Music and Sound Effects: CapCut allows users to incorporate background music and sound effects into their product videos. Users can choose from a library of royalty-free music or import their own audio files. This attribute helps set the mood, enhance storytelling, and add a professional touch to the video.
- Transitions and Effects: CapCut offers a variety of transitions and effects, including fades, wipes, and zooms. These features enable smooth scene transitions and dynamic visual effects, creating a more engaging and captivating viewing experience for the audience.
- Collaboration and Sharing: CapCut supports collaboration by allowing users to work on projects together. Multiple users can edit different sections of the video simultaneously, streamlining the workflow and enhancing productivity. Additionally, CapCut provides easy sharing options, enabling users to export and distribute their high-quality product videos across various platforms.
Step-by-Step Guide to Creating High-Quality Product Videos Using CapCut
Source: CapCut
Step 1: Plan and Outline Your Video
Before diving into the production process, it’s essential to plan and outline your video. Determine the goal of your product video and the message you want to convey. Identify the key features and benefits of your product that you want to highlight. Consider the target audience and tailor your video content accordingly. Having a clear plan will help you stay focused throughout the production process.
Step 2: Gather Your Resources
To create a compelling product video, you need to gather all the resources required. This includes your products, any additional props or accessories, and the necessary equipment, such as a smartphone with a good camera, tripod, and lighting setup. Make sure your products are clean and well-presented, as they will be the star of the video.
Step 3: Shoot Your Footage
Once you have all your resources ready, it’s time to start shooting your footage. Set up a dedicated shooting area with good lighting conditions. Natural light works best, so try to shoot near a window during the daytime. Use a tripod to keep your shots stable and avoid shaky footage. Experiment with different angles and perspectives to showcase your product from various angles. Focus on capturing the product in action, demonstrating its functionality and benefits. Additionally, you can include close-up shots to highlight specific details.
Step 4: Transfer Footage to CapCut
After capturing your footage, transfer it to your PC and open CapCut online editor. CapCut is user-friendly and offers a range of features that will help enhance your product video.
Step 5: Upload and Arrange Your Footage
In CapCut, upload your footage by tapping on the “Upload” icon and selecting the videos you want to include in your product video. Arrange the clips in the desired order to tell a cohesive story. You can trim the footage to remove any unnecessary sections and ensure a smooth flow.
Step 6: Add Transitions and Effects
CapCut provides a variety of transitions and effects that can add a professional touch to your product video. Experiment with different transitions, such as fades or slides, to smoothly transition between scenes. You can also apply filters and color grading to enhance the visual appeal of your footage. However, remember to maintain a consistent look throughout the video to create a cohesive and professional result.
Step 7: Include Text and Graphics
To provide important information about your product, add text overlays and graphics. CapCut offers a range of text styles, fonts, and animations to choose from. Use text to highlight key features, showcase pricing or discounts, or display any other relevant information. Ensure that the text is legible and complements the overall visual aesthetic of your video.
Step 8: Add Music and Sound Effects
Music and sound effects can greatly enhance the impact of your product video. CapCut allows you to import audio files or choose from its library of royalty-free music and sound effects. Select a suitable background music track that matches the tone and mood of your video. Adjust the audio levels to ensure a balanced mix between the music, voiceover (if any), and the product sounds. You can also refine the background of your video using the video background remover.
Step 9: Fine-tune and Edit
Once you have added all the essential elements to your product video, it’s time to fine-tune and edit the footage. Use CapCut’s editing tools to adjust the brightness, contrast, saturation, and other visual parameters to achieve the desired look. Pay attention to the pacing of your video and make sure it aligns with the message and goal you established in the planning phase. Smooth out any rough transitions or inconsistencies to create a polished final product.
Step 10: Export and Share
After completing the editing process, preview your product video to ensure everything looks and sounds as intended. Once satisfied, export the video in the desired resolution and format. CapCut offers various options for exporting, allowing you to optimize the video for different platforms or devices. Finally, share your high-quality product video on your website, social media channels, or any other relevant platforms to effectively showcase your products to the world.
Conclusion
Creating high-quality product videos using CapCut can significantly elevate your marketing efforts and help you effectively showcase your products. By following this step-by-step guide, you can capture your audience’s attention, highlight the unique features and benefits of your products, and leave a lasting impression.
Umar Nisar was born and raised in the busy city of Abbottabad. As a journalist, Umar Nisar has contributed to many online publications including PAK Today and the Huffing Post. In regards to academics, Umar Nisar earned a degree in business from the Abbottabad UST, Havelian. Umar Nisar follows the money and covers all aspects of emerging tech here at The Hear Up.
Thanks